
Humans have been producing bread for millennia, but it wasn’t until 1888 that yeast was isolated and propagated in pure culture. Before that time, all bread was naturally leavened using sourdough. What is now seen as an artisanal product was once the everyday humble loaf.
While sourdough may seem intimidating to the beginner baker, with a bit of patience and practice, anyone can bake delicious homemade bread. All you need is flour, water, salt and time. It doesn’t even take that much physical labour. If you let the natural processes do the hard work, all that’s required is to focus on timing.
Contents
- Flour, water, salt & time
- Equipment
- Nutritional benefits
- How to make a new sourdough starter
- How to feed and maintain a sourdough starter
- The importance of discard
- Baking with a sourdough starter
- Shaping dough
- The importance of steam
- How to store sourdough bread
- Sourdough recipes
- Troubleshooting & FAQ
Ingredients for Sourdough Bread
Using the best ingredients available will guarantee baking success.
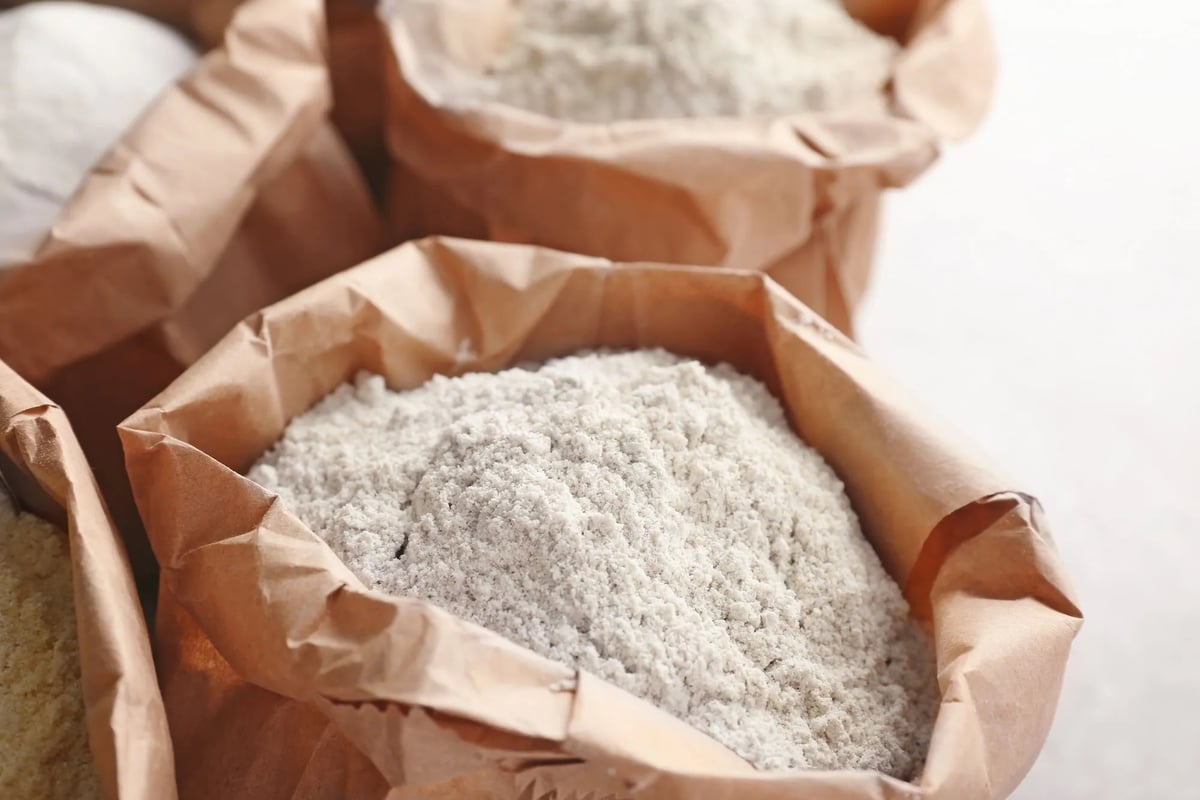
Flour
Flour comes in many types and forms. From highly processed, shelf-stable flour that you might typically find at your local supermarket, to freshly stone-ground, small batch production, you’ll discover flours from any number of different grain types.
There are two things to be aware of regarding flour that is easy to find off the shelf at your regular grocery store:
- While industrially milled flour can be stored for longer without any issue, the majority of the nutrients in the grains have been removed in the process.
- The type of wheat grains that are being used have been bred to be high-yielding crops. It is by no means similar, differing both genetically and biochemically from the natural varieties grown and produced just 40 years ago. They are not bred to be delicious or nutritious.
Why is this important? Choosing a flour that has been stone-ground locally from good quality locally farmed grain is not only better tasting, but it is better for the environment. Furthermore, while most people believe that the yeast used for sourdough is cultivated from the air around us, the majority of the yeast in sourdough starters is growing on the grain itself and is, therefore, more readily present in good-quality stone-ground flour.
Protein content in flour varies depending on the grain type. The higher the protein content (stronger), the better the gluten structure in dough. For baking delectable cakes, one would turn to lower protein content flour; however, to produce the best sourdough loaves, a high protein content bread flour is the ideal option.
Many farmers around the world still believe in producing fantastic traditional varietals of wheat. Here in Toronto, I get freshly ground, organic flour from a local urban mill right in the centre of the city: Brodflour. They have developed strong relationships with a number of Canadian farmers who grow hard red wheat, spelt, emmer, einkorn and rye.
If I were still living back home in the UK, I would probably be buying my flour from somewhere like Shipton Mill or Doves Farm.

Water
The hydration level in dough is the water quantity relative to the total flour. For example, if a recipe calls for 500g of flour and 350g of water, the dough would have 70% hydration. Different types of flour, and how fresh they are, will vary in how much water they can absorb. All doughs and flour types will have a tolerance of how much or how little water can be used.
Using high hydration in a dough will yield a moister loaf with a soft crumb, however, it is much harder to handle and work with. For beginners, it is probably wise to start with hydration of around 70% before considering further increasing water content in a recipe.
It is also worth noting where your water supply is coming from. Most municipal water supplies will use chlorine to ensure tap water is safe to consume. Some microorganisms are sensitive to chlorine, such as yeast. If your water supply has high levels of chlorine, it may affect your fermentation as well as possibly impart an unpleasant flavour to your bread.
If you would like to remove chlorine from your tap water before baking, here are some options:
- Boil water for 20 minutes and then leave it to come back to room temperature before use.
- Leave water out on the counter for 24 hours to allow the chlorine to naturally evaporate.
- Use an activated charcoal filter.
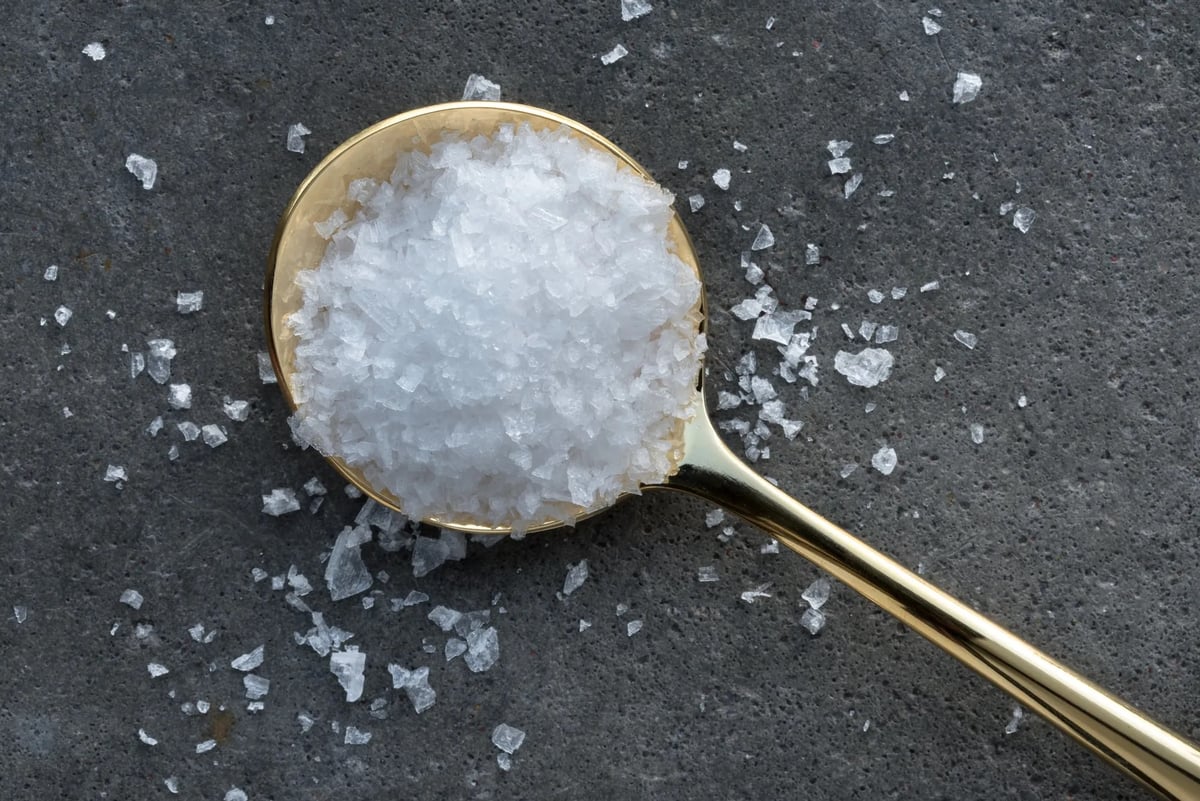
Salt
There are many different types of salt from all over the world, each containing a different balance of accompanying minerals. When referring to salt in my sourdough recipes, I am using sea salt. This is produced by evaporating seawater, which results in a mineral-rich salt.
While most different types of salt also contain other minerals, table salt is salt in its purified form: sodium chloride. Since table salt has little to no other minerals, the same amount of sodium chloride weighs less. If this is the only salt you have available when baking, you will need to halve the salt content in your recipe.

Time
The fourth ingredient. Rather than mixing commercial yeast into a dough, sourdough relies on creating appropriate conditions for the natural yeast and bacteria that exist on the grains to strengthen and multiply. As one masters the art of sourdough baking, they will come to understand how long certain processes will take and know what signs to look out for. Timing is key, whether for ensuring your starter is active, allowing autolysis to occur, or when to add strength to your dough through stretch and fold.
Essential Equipment
I don’t have a fancy stand mixer or any expensive tools, but there are a few essential items that will set you on the road to success. All of these items should be available at a local kitchen equipment retail shop:
- 2×750ml glass jars with lids
- Jar spatula (helpful for feeding your starter, but you can use a spoon if you like)
- Digital kitchen scales
- Instant read thermometer
- Timer
- Large mixing bowl (one with measurement marks on the side would help determine how much the dough has grown)
- Soft dough scraper
- Bench scraper
- Proving basket
- Bread peel or pizza peel
- Bakers lame or sharp cutting knife
- A thick pizza stone/fire bricks or a cast iron pot
Nutrition
While the taste and texture of sourdough are reason enough to bake your own bread, the nutritional benefits are a bonus that make the time investment even more worthwhile.
The long fermentation process that gives sourdough its distinctive flavour also transforms the grain in ways that make it more digestible and nutritious. The naturally occurring lactobacilli bacteria in your starter break down proteins and starches, essentially breaking down complex compounds before they reach your digestive system. This is why many people who struggle with commercial bread find sourdough easier on their digestive system.
The fermentation process also reduces the bread’s glycaemic index compared to commercially yeasted breads. Rather than causing a sharp spike in blood sugar, sourdough releases energy more gradually, keeping you satisfied for longer. This is particularly pronounced when using whole grain flours, which retain more of the grain’s natural fibre and nutrients.
Perhaps most importantly, the acidic environment created by the sourdough culture increases the bioavailability of minerals naturally present in the grain. Iron, zinc, and magnesium become more readily absorbed by your body. When you choose quality, stone-ground flour from heritage grains, you’re getting access to nutrients that have been stripped away from industrially processed flour.
It’s worth noting that not all sourdough is created equal. The long, slow fermentation described in this guide is what provides these benefits. Commercial “sourdough” that relies on added yeast and vinegar for flavour won’t offer the same nutritional advantages as bread made with a properly maintained starter and given time to develop.
The simple truth is that bread made with just flour, water, and salt—given time to ferment properly—is fundamentally different from the highly processed loaves found on most supermarket shelves. It’s closer to what humans have been eating for thousands of years, and your body knows what to do with it.
How to Make a New Sourdough Starter from Scratch
Bread making is all about controlling fermentation using yeast. The difference between sourdough and other bread types is how the yeast is cultivated. Rather than relying on commercially developed yeasts, sourdough requires the use of a sourdough starter that contains naturally occurring lactobacilli and yeast. In just a few days, you can easily make your own starter, and if looked after through regular feeding, it will last you a lifetime.
I use a combination of wholegrain rye flour and strong bread flour to feed my starter. It is important to use kitchen scales and an instant-read thermometer for accuracy.
Day 1
In one of your two glass jars, mix 50g of whole grain rye flour with 80g of water at 28–30ºC. Place the lid on loosely and leave it in a warm part of your house for 24 hours (I leave mine in the kitchen). You don’t want it to be completely airtight.
Day 2
It may take a few days before you see any visible signs of activity in your starter, but keep going, and you will see changes as the week goes on. Add another 50g of rye flour and 80g of water at 28–30ºC to the jar, mix and leave it with a loose-fitting lid for another 24 hours.
Day 3
You should start to see some bubbles forming on the top and the sides of your starter. Add another 50g of rye flour and 80g of water at 28–30ºC to the jar, mix and leave it with a loose-fitting lid for another 24 hours.
Day 4
At this point, the mixture will be teeming with active microorganisms. You will see and smell signs of fermentation. In the second jar, add 50g of the mixture from the first jar with 50g of rye flour and 80g of water at 28–30ºC, mix and leave it with a loose-fitting lid for another 24 hours. Discard the contents of the first jar.
Day 5
Air bubbles will have clearly formed inside the glass, and there should be evidence that the mixture has risen and fallen. The starter is now ready for regular feeding. In your washed-out glass jar, add 50g of starter and mix in 50g of rye flour with 50g of strong unbleached white bread flour and 130g of water at 28–30ºC, mix and leave it with a loose-fitting lid for 12 hours. Your starter should now be ready for setting the leaven and baking, however, it would probably be wise to feed it at least once or twice more before doing so.
How to Feed and Maintain Your Sourdough Starter
Just like all living things, yeast requires food to function. The yeast in a sourdough starter releases enzymes to convert starches within flour into glucose, which it then eats, the byproduct being alcohol and carbon dioxide. The CO2 is what makes bread rise as it expands while baking, trapped in-between the dough’s gluten structure, unable to escape. Once all the food has been consumed, the micro-organisms will require new food in the form of more flour and water.
To keep your starter healthy and in good shape, regular feeding is required. Depending on how often you plan to bake, you may want to refrigerate your starter in between to reduce how often you need to feed it. If my starter is out of the fridge, I feed my starter at least once, if not twice, a day. When storing in the fridge, I will remove the starter at least 24 hours before I plan to start making dough and feed it twice in that time. If you don’t plan to bake very often, make sure to take your starter out once a week to feed returning it to the fridge once the starter has risen and fallen, which should take 8–14 hours, depending on room temperature and how active your starter is.
Daily Feeding Instructions
Remove the starter from the refrigerator if it is not already being stored on the counter.
In a clean glass jar, add 50g of starter and mix in 50g of rye flour with 50g of strong unbleached white bread flour and 130g of water at 28–30ºC. Mix thoroughly.
Allow the starter to sit in a warm place for approximately 12 hours with the lid loosely on to allow air to get in. The starter should rise, tripling in volume, before beginning to sag.
Either return to the fridge if you are not planning to bake the same day, or feed it again, or use it to set the leaven.
Why You Need to Discard Sourdough Starter
When I first started working with sourdough, I hadn’t quite gotten my head around why it is important to discard some starter every time you feed the dough. Yeasts aren’t fussy; they can reproduce both sexually and asexually depending on the conditions they are experiencing. Feeding a sourdough starter will provide the yeast contained within the starter with food, which will then allow the yeast to multiply. Just what we bakers want.
Imagine every time you ate, you split in half and became two identical versions of yourself. The next time you and your twin sit down to dine, you will only have the same amount of food on the table. You split it between you, but you’re both still a bit hungry. You both then split in two again and become four. As this pattern repeats itself, you can imagine that you would swiftly become malnourished, and eventually wither and die. This is the same case for yeast.
If you choose not to remove some of your starter each time you feed, you would need to at least double the amount of flour and water used every time to keep your starter at its peak effectiveness. That would become costly and hard to manage as it expands. By discarding some of the starter prior to feeding, you can keep the amount of flour and water used down to a reasonable level.
If you feel that throwing away some starter regularly is a waste, fear not; there are plenty of recipes that can use up discard.

How to Bake with a Sourdough Starter
Below, I will outline the process and techniques I use when baking with a sourdough starter. I use this method throughout my sourdough recipes.
Leaven
While not all bakers/recipes choose to, for me, each baking session begins with setting a leaven. A leaven is an offshoot of a starter—a mixture of fresh flour, water and some ripe starter—which is used as a preferment for a dough. It allows you to have more control over your fermentation by ensuring that the starter being used is at peak fermentability. You can also use a leaven to skew the populations of yeast and lactobacilli, which has an effect on the taste and texture of your final bake. This is helpful when making enriched doughs.
Another advantage of using a leaven, instead of just using some starter as a rising agent, is that you can keep your sourdough starter small and scale it up for each bake. As with everything sourdough, all that is required is a little planning and time.
The leaven must be allowed to progress properly before being incorporated into a dough. There must be clear signs of fermentation. Small bubbles on the surface are a clear indicator. There should be a scent of mild acidity with a fruity, ripe, sweet note on the nose.
If you are unsure if your leaven is ready for baking, one surefire way of checking is to implement a floating test. Place a teaspoon of the leaven in a glass of water. If the leaven floats, there is CO2 present, indicating that fermentation has begun, and it is ready to raise a larger dough. If it doesn’t float, allow extra time for further maturation before combining it into a dough. If used underripe, the dough will not rise at the pace required, nor will it develop good gluten strength.
Leaving the leaven to become overripe is not ideal either. Over time, a sharp acidity will build up that propagates in the dough and may overpower the flavours of the grain.
The quantity of starter used in a leaven, and the room temperature it is stored in, will vary the time it takes to mature. This allows you to have the flexibility to set the leaven for a same-day bake, or overnight for a morning bake. When baking sourdough, make sure to set aside enough time to feed your starter and to set the leaven before starting your bake.
Mix
Once your leaven is mature, it is time to mix the dough. Many recipes call for the use of a stand mixer or similar, which will heavily knead the dough. There is nothing wrong with doing so, however, I prefer to let nature do most of the work for me. In fact, I don’t even have one.
Mixing dough by hand may sound like a lot of work, but all that is required is to ensure all the ingredients are combined, followed by some periodic strengthening at set intervals. Although the fermentation time for sourdough is long, the actual hands-on work is minimal.
The mixing process starts by combining water and the leaven in a mixing bowl using your fingers. Add the flour next and use your hands to stir, ensuring all is combined. The dough should be scraggly and rough-looking, and very sticky. Use a soft dough scraper or spatula to scrape down the sides before loosely covering the bowl.
Autolysis
You may have noticed that there was no salt in the previous step. Autolysis—or “delayed-salt” method—allows the dough to do the hard work so that you don’t have to. The term is Greek for “self-digestion”. Salt slows down yeast activity. Delaying the addition of salt allows the yeast to rapidly develop within the dough, increasing fermentation activity.
By mixing your ingredients together carefully and leaving the dough to rest for one hour, a solid gluten structure forms naturally, just as it would during kneading. Autolysis also improves a dough’s elasticity, resulting in a dough that’s more comfortable to handle and develops large air pockets, contributing to a greater rise.
Pinch
After autolysis is complete, it’s time to introduce the salt to your dough. It is important to measure out the correct amount of salt. Too much and you’ll impact the dough’s rise. Too little and the dough will prove quicker, which may impact flavour.
To combine the salt into the dough, I use a pinching motion. Sprinkle the salt over the dough and use your thumb and forefinger to pinch the dough at various angles until the salt is combined. Stop as you feel the dough begin to tighten and it becomes harder to pinch. This helps break up the dough’s gluten network, forcing restructuring, which helps to form more and stronger bonds. This is also the stage I would include other ingredients if I were making an enriched dough.
Let your dough rest for 30 minutes before continuing to the next stage.
Stretch & Fold
By stretching and folding the dough over itself, the glutens are elongated and strengthened, improving the gluten network, which will help the dough hold its shape and trap more air, resulting in a greater rise. In addition, the temperature of the dough will be more evenly regulated.
Before you handle the dough, dip your hands in lukewarm water. Gently grab the underside of the dough at one side of the bowl, stretch it slightly and fold it over towards the opposite side. Repeat, working your way around the bowl, 4–8 times, until you feel the dough tightening and firming up.
For most recipes, I will complete three sets of stretch and fold with 30-minute intervals between. After the final fold, let the dough rest and continue fermentation until it has increased in volume by approximately a third. This will usually take about an hour, depending on the ambient temperature and the liveliness of your starter, but it can take anywhere between 30 to 90 minutes. Using a mixing bowl with measurement marks on the side can be helpful here with accuracy.
Pre-Shaping
An important step to ensure good crust development. The goal is to create a taught skin while letting the dough relax before final shaping.
Remove the dough from the bowl, place it on a lightly floured surface, fold it over itself several times using a bench scraper, before turning it fold side down. Work your way around the dough, tucking in the edges under itself using the bench scraper to make the dough taught. If the dough scraper is sticking to the dough, use some flour on the bench scraper.
Bench Rest
By letting the dough rest at this point, the gluten bonds have a chance to relax, which will make shaping the dough easier. Simply sprinkle a little flour over the dough and leave it on the counter for 15–30 minutes. Once the dough has become a little flatter around the edges, you can move on to the next step.
Shaping
There are many different bread shapes and techniques used around the world. Whether you plan to bake your loaf in a tin or braid your dough into a fancy pattern, shaping techniques take time to master.
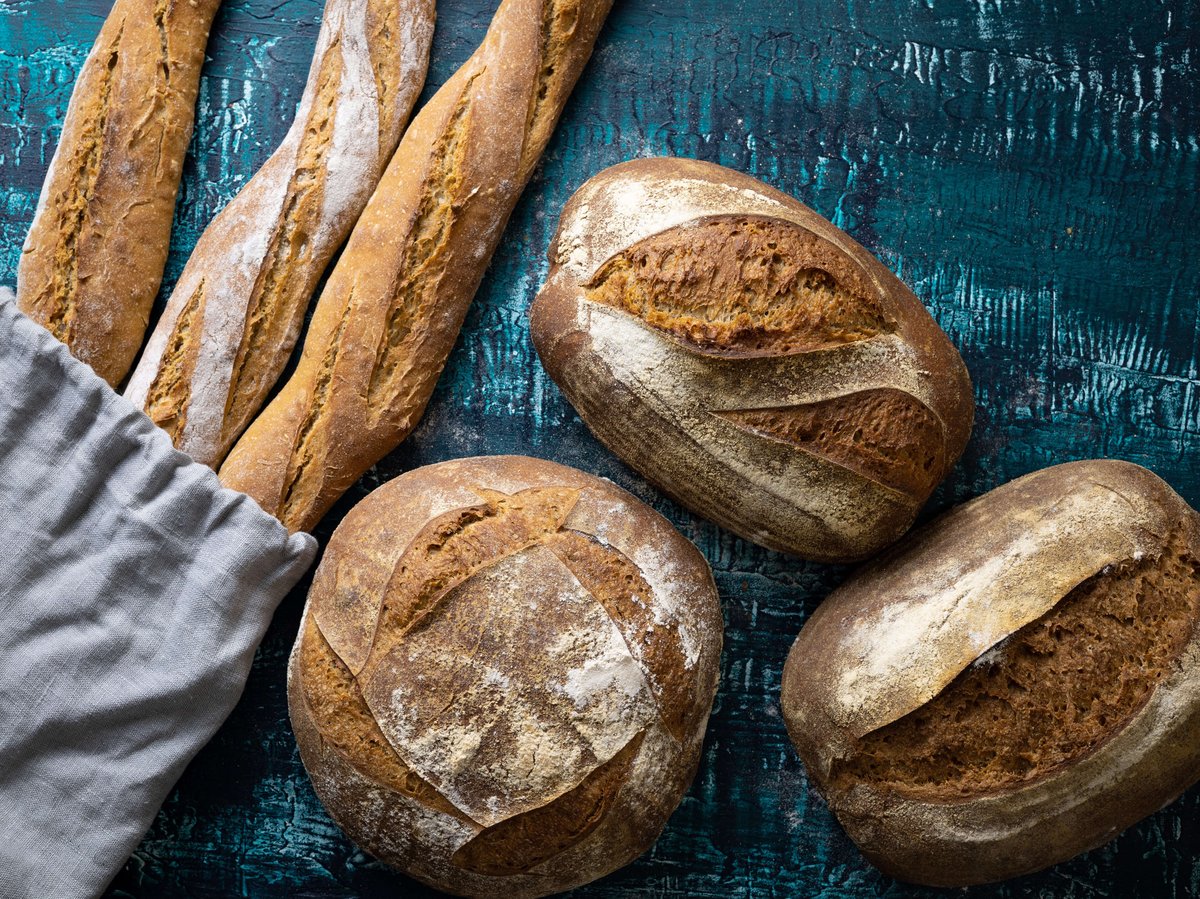
The three most common rustic bread shapes are boule, batard and baguette. It is important to have the correct proving vessel for the bread shape you are trying to create, and remember to flour them well so your dough doesn’t stick—it’s very frustrating when it does. I like to use rice flour on my proving baskets and baker's couche as it performs far better than other flours to prevent sticking. This is because rice flour won’t swell upon contact with the wet dough.
How to Shape a Boule (Round Loaf)
Dust some bread flour over your work surface and on your resting dough. Loosen the dough from the surface using your dough scraper and flip it over so the floured top is facing down. Gently grab the top edge of the dough and fold it inwards to the centre, then do the same with the left side, right side, and finally the bottom edge. The result will be a square-shaped piece of dough.
Next, lift one corner up and over inwards towards the centre. Repeat with the other three corners. Once all four corners have been folded, gently flip the dough over so the smooth side is facing up and the folds are underneath. Using your dough scraper, tuck in the edges, as you did in the pre-shaping, to ensure a taught surface. Handle with care throughout the process in order not to knock out any air from your dough.
How to Shape a Batard (Oval Loaf)
Dust some bread flour over your work surface and on your resting dough. Loosen the dough from the surface using your dough scraper and flip it over so the floured top is facing down. Gently grab the top edge of the dough and fold it inwards to the centre, then do the same with the left side and right side. Grasp the bottom and pull it all the way to the top, then take one of the top corners and pull it to the other side, then do the same with the other corner. Work your way down the dough, pulling from the sides across to the other until you get to the bottom, then pull the bottom edge to the top, then the top to the bottom in one motion.
Once you have done that, you will have a batard. Use a dough scraper to tighten the sides and then place it into the proving basket until ready to bake. Handle with care throughout the process in order not to knock out any air from your dough.
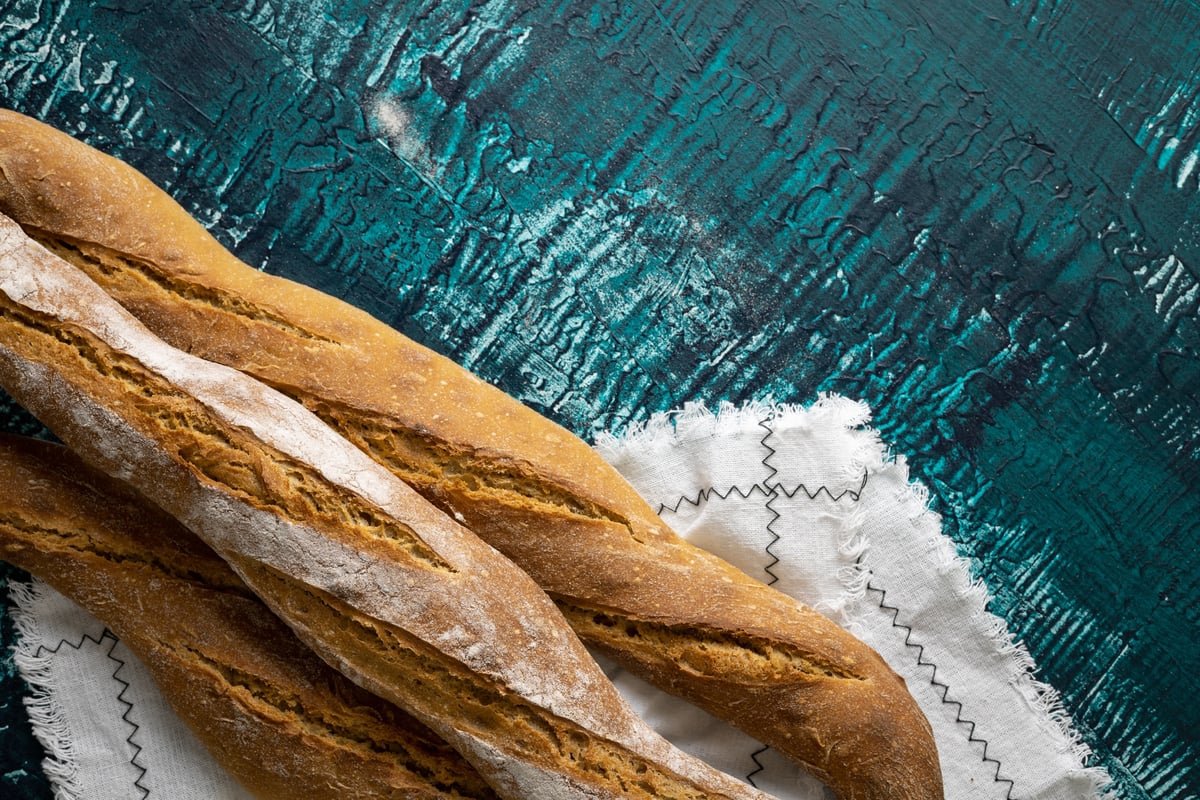
How to Shape Baguettes
A full-sized baguette is not likely to fit in most consumer ovens. I recommend shaping a Demi-baguette when baking at home. Dust some bread flour over your work surface and on your resting dough. Loosen the dough from the surface using your dough scraper and flip it over so the floured top is facing down. Gently grasp the top edge of the dough round and fold it down halfway down the dough. Give it a gentle tap to help it stick, being careful not to knock any gas out of the dough. Now turn the dough around 180º and again take the top (which was the bottom) down to the middle and give it a gentle tap.
Fold the dough again, this time all the way, using your thumb and the heel of your hand to seal the seam as you go. Work along the dough in stages. Turn the dough around and repeat the other way. Use your fingers to pinch the seam a little to ensure it is completely sealed.
Turn the dough so the seal is on your work surface. Gently roll from the centre, trying not to knock out too much air, lengthening the dough as you roll, tapering the ends slightly. Place your baguette into a baker’s couche until ready to bake.
Basket Proving
As mentioned earlier in this guide, fermentation time is governed by many factors. The temperature of the dough, how active the starter was, and what type of flour was used are just a few of many factors that can influence how long it will take for your dough to prove. How long it took for your dough to increase in size after stretch and fold will help you assess how long to prove. Generally, proving should take 1½–2 hours, but maybe shorter.
While perfectly fermented dough yields volume and a light and open crumb, over-proving can lead to large craters forming within, which can lead to your dough collapsing. If you don’t prove the dough enough, the yeast will still have too much activity in it, and the dough will try and continue expanding even once the crust has formed, which can lead to the bread tearing. As you can imagine, it’s better to underprove rather than overprove, but there’s nothing better than bread when you’ve got it just right.
Leave your dough on the counter in its proving vessel uncovered—unless otherwise specified in the recipe—until basket proving is complete.
Retard
Also known as “cold proving” or “cold proofing”, the retard phase slows down yeast activity. By placing your dough in the refrigerator, you can leave your bread until you are ready to bake, perhaps even the following morning. But furthermore, the dough continues to develop, increasing in flavour and beneficial nutrients. And if you ask me, flavour is the aim of the game!
Cover your dough with some cling film or another loosely fitting cover and place in the refrigerator for 12–24 hours before moving on to the next stage.
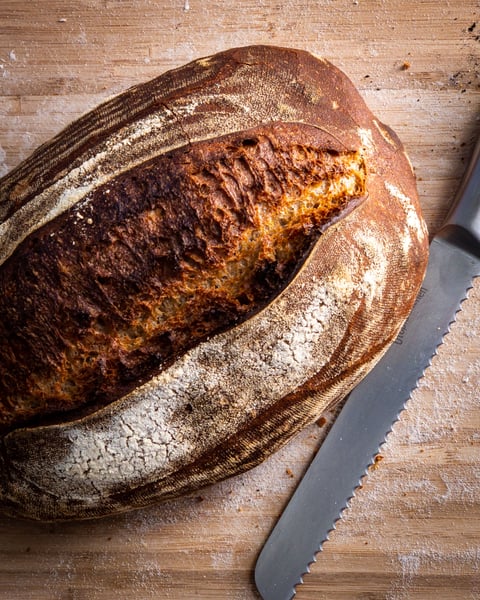
Scoring
While often seen as the decorative element of the baking process, scoring dough also provides a function. The gases produced by the yeast expand during the baking process and are trapped within the dough’s gluten network, which leads to increased pressure resulting in bread expansion. The gases will try to escape through weak points in the dough’s surface, sometimes resulting in bursting and wonky-looking loaves.
Scoring a loaf helps control the expansion during baking by creating weak points in desired areas, resulting in a more even loaf. I prefer to keep scoring simple and functional, however, some bakers choose to be artistic at this point. Instead of simple lines cut for a specific purpose, they may decide to make many smaller, more shallow cuts to create the same effect along with a pattern. Historically, artistic cuts were used to distinguish who had baked the loaf, with bakers having their own signature patterns.
To get started with scoring, I recommend keeping things simple and functional. For a batard, score with either a single slash or double slash approximately 5mm deep using a curved blade at a 45º angle down the loaf. For a boule, either slash a large cross on the top or a large square box on the top using either a curved or straight blade approximately 5mm deep. For a demi-baguette, make 3–4 slashes down the loaf lengthways, making sure to overlap by about a third, keeping them as straight as possible to promote sideways expansion, using a curved blade held at a 45º angle approximately 5mm deep.
Make sure not to remove the dough from the proofing basket until you’re ready with your baker’s lame. Scoring should occur right before placing the loaf in the oven to bake.
Baking
There are two important factors when ensuring a good bake: strong, absorbent heat combined with steam. Using a conventional oven, you can achieve this using either a preheated Dutch oven or baking on scorching hot firebricks/thick pizza stone. I prefer the latter, however, I will outline both methods.
Using a Duth Oven
Place your Dutch oven with its lid on the bottom shelf of your oven and preheat it at the highest temperature it will go for an hour. Once the hour is up, remove the dough from the fridge and leave it on the counter, then remove the Dutch oven from the oven using oven gloves, placing it on a heatproof surface with the lid off.
Sprinkle a little flour onto a bread peel or pizza peel, then turn the loaf out gently onto it. Score the loaf and carefully slide the dough from the peel into the pot—don’t worry if the dough is slightly skewed the first few times you do this, as the pot will shape the loaf such that the loaf will remain presentable. This step will get easier with practice.
Using oven gloves, place the lid on top and place the pot in the oven and follow the recipe's baking instructions. The bread will produce moisture, which will become steam trapped in the pot, allowing for greater expansion. Open the pot halfway through cooking and leave it open to create a beautiful golden crust.
Using Firebricks
You can buy firebricks with ease from your local building supplier. They are a general size, but the thickness varies. Approximately 2cm would be ideal, and six will be enough. Alternatively, you can use a pizza stone, but these are often thinner and won’t produce as much heat. Place them on the second-lowest shelf in the oven and place a roasting tin on the shelf below. Preheat the oven to the highest temperature for 1–1½ hours.
Once this time is up, boil 500ml of water and pour it into a jug that’s easy to pour from. Remove the dough from the fridge and turn the loaf out gently onto a lightly floured bread/pizza peel. Score the loaf, then slide the dough onto your firebricks in the oven and pour the water into the roasting tin. Follow the recipe's baking instructions.
Why Steam is Critical for Sourdough Oven Spring
When you place a loaf in a hot oven, gases expand and the yeast has a final burst of activity, creating expansion. This is known as oven spring. Creating steam inside this environment keeps the crust soft, which will allow the dough to expand even further, producing a light and airy loaf. Furthermore, heat transfers quickly in a humid environment compared to a dry environment. The first few minutes of baking are the most crucial. For the second half of a bake, it is more beneficial to remove moisture to allow the crust to firm up so that it holds its shape and becomes a beautiful golden colour.
Professional bakers will use a steam-injection oven to get the best results, but you can easily create steam at home too. If you are baking using a Dutch oven or similar vessel, the loaf will give off moisture during baking, which will become a natural form of steam. Regardless of how you cook, spritzing your loaf with some warm water before baking will add further moisture to your bake.
How to Add Steam to an Oven
When baking with firebricks, you will need to add extra steam to your oven during the early stages of the bake. The easiest way to do so is to place a roasting tin on the bottom shelf of the oven and add around 500ml of boiling water as you place the loaf in the oven. Be careful, as there will be a lot of steam as the water hits the pan. Make sure to wear oven gloves to prevent burns.
While this works, there are a number of things you can do to further improve steam creation and retention.
- Most modern ovens vent hot air. By taping up oven vents from which steam has appeared in the past, you will reduce the volume of lost steam. There may still be some steam lost from the door, but there’s not much you can do about that.
- Add lava rocks to the roasting pan before preheating the oven, then pour the water as you place the loaf in the oven, just like a sauna.
- Spritz your loaf with warm water before placing it into the oven. This won’t create much steam on its own, but it concentrates moisture on the loaf and will improve oven spring in combination with other steam already inside the oven.
Resting
After baking, it is important to let your bread cool. Cutting the bread too early will release steam from the loaf, which will result in an overall drier loaf. The structure of the loaf may also be affected.
How to Store Sourdough Bread
Sourdough bread tends to last longer than commercially yeasted loaves, however, you can extend a loaf’s life by storing it correctly. Leaving a loaf in an airtight environment, trapping the bread’s moisture, will likely cause mould. Leaving a cut loaf out on the counter will swiftly result in a rock-solid lump. Putting bread in the fridge will make it stale.
Sourdough bread stored correctly should last several days at room temperature. To keep a loaf on the counter, leave it cut side down on a cutting board. If you’d like to put bread away, either put your loaf in a bread bin or a linen bag. I use one made locally here in Toronto by Lot 8 .
To keep your loaf even longer, freezing works exceptionally well if well wrapped. You can store whole loaves in the freezer, or alternatively, you can slice your loaf and place slices in a box or freezer bags, ready to toast when you want a piece.
Sourdough Recipes
Everyday Sourdough Loaf
Max's sourdough recipe for perfect everyday bread. Crusty exterior, soft interior with that signature tangy flavour we all love.
 2 days
Naturally Leavened Panettone
Made just like the traditional panettoni of old, this recipe requires the use of natural yeast and a fermentation period of over 30 hours.
2 days
Sourdough Baguettes
Make delicious sourdough demi-baguettes at home. Perfect for domestic ovens, these shorter baguettes deliver authentic French flavour with crispy crust and open crumb.
2 days
Sourdough Cardamom Knots
A classic Swedish baked good, kardemummaknutar, these delectable delights are found in bakeries around the world.
2 days